Adding Miniservers
Connect your Loxone Miniserver with automatic pairing, provisioning codes, or manual credentials
Where to Find This Feature
-
Navigate to "Miniserver" in your workspace
-
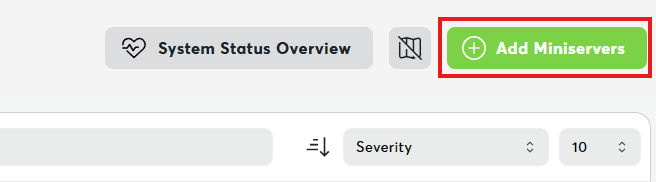
Click on "Add Miniservers" or the "+" icon
-
A dialog opens with different options
Option A: Connect with Loxone Config (Recommended)
Prerequisites
- Miniserver Firmware >= 15.2.9.30
- Access to Loxone Config
Step-by-Step Process
-
Display Provisioning Code
-
First click "Add Miniservers" at the top right.
-
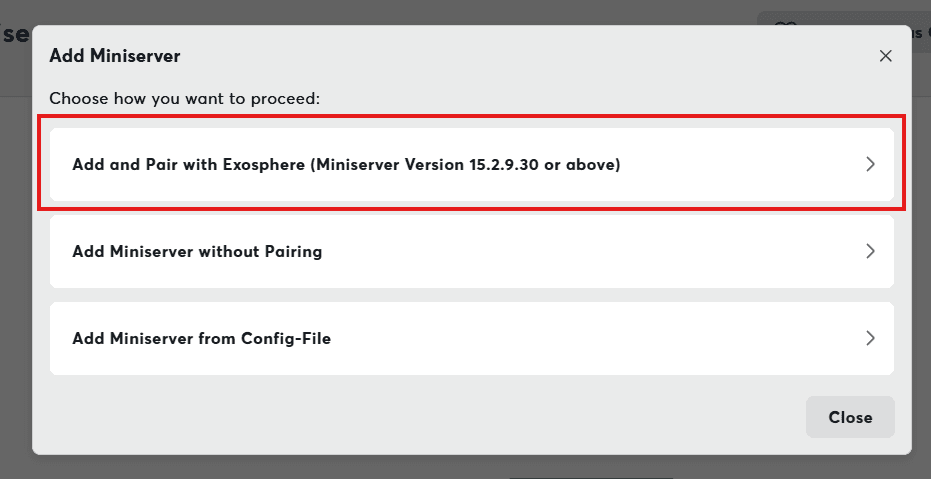
In the modal that opens, select "Add and Pair with Exosphere".
-
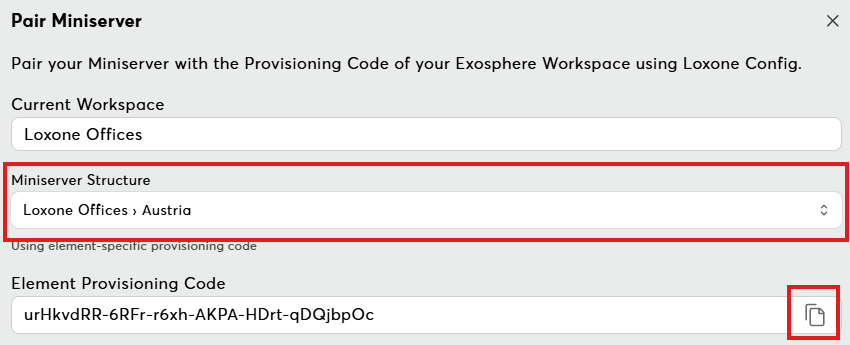
The dialog will display your workspace name and a unique Provisioning Code.
-
If you are using an Enterprise Workspace, you can add the Miniserver directly to a specific structure element.
-
Copy this code (use the clipboard button).
-
-
Open Loxone Config
- Open your Miniserver configuration in Loxone Config
- Make sure you are connected online
-
Install Exosphere Plugin
-
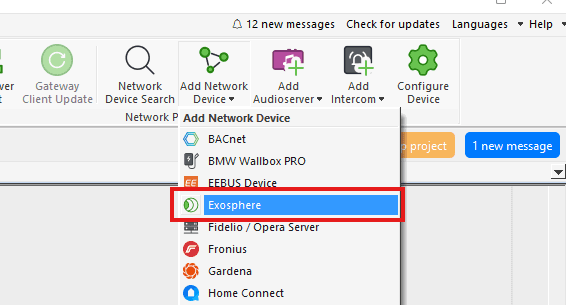
In Loxone Config: Add Network Device -> Exosphere
-
Add and configure plugin:
- Provisioning Code: Paste code from Exosphere
- Role: Set a role (Exosphere needs Permissions)
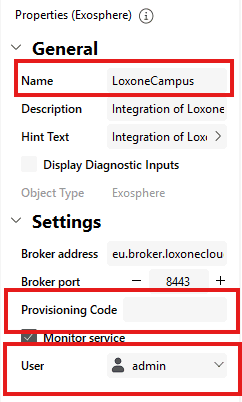
- Tip: Give your Exosphere Plugin a descriptive name so you can easily identify and manage it later.
- Save and upload to Miniserver
-
-
Done!
- The plugin automatically contacts Exosphere
- Your Miniserver appears in the device list after a few seconds
- Status is set to "Connected"
- Configuration is automatically synchronized

Not connected or having problems?
See Connection Troubleshooting for detailed solutions.
Option B: Legacy Pairing Method
When to Use
- Older firmware versions
- Miniserver without active Remote Connect connection
Step-by-Step Process
-
Start Connection Wizard
- Select: "Add device without automatic pairing"

- Enter the serial number(s) (format:
504F94XXXXXX) - You can enter multiple serial numbers at once (separated by comma, space, or line break)
- Select: "Add device without automatic pairing"
-
Configure Devices
For each Miniserver:
-
Name (optional): Assign a descriptive name
-
User: Login with miniserver credentials.
-
Exosphere User: Select an user for all communication between Exosphere and the Miniserver
Important Note
The user must already be configured on the Miniserver and should have all necessary rights to query data and perform backups & upgrades. Learn more about Users & Permissions
-
-
Confirm Addition
- Click "Add"
- Devices are created and displayed in the list
- Miniserver is added to your workspace and the status is set to "Connected"
Option C: Import from File
Adds devices as unmanaged - they're registered but don't use a license yet. You can activate full features later with "Manage Device" (remote control, data collection, monitoring).
Learn more about device connection status.
Prerequisites
- Loxone Config project file (
.loxone)
Step-by-Step Process
-
Select File
- Choose: "Import from Loxone Config file"
- Upload dialog opens
-
Upload Project File
- Select your
.loxoneconfig file - Click Browse and select your file or drag & drop your program file into the area
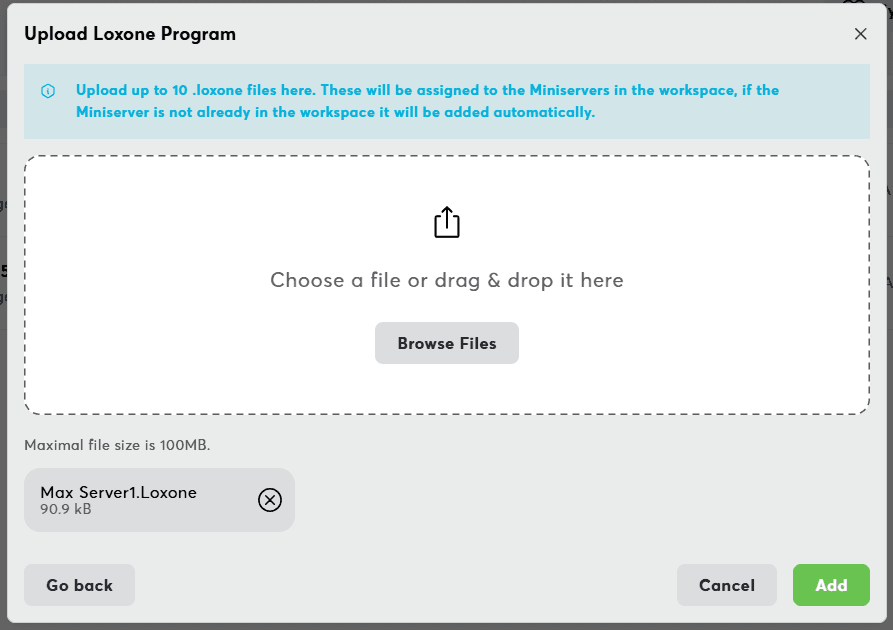
- Select your
-
Miniserver(s) are added
- Detected Miniservers gets added to the device list in Unmanaged State.
Best Practices
Device Management Tips
Recommendations:
- Assign descriptive names to your Miniservers
- Use element assignment for better organization
- Keep Miniserver firmware up to date
Bulk Operations
Working with multiple devices:
- Copy-paste serial number lists
- Use filters in device list for quick finding
- Individual error reporting per device