Export Database Data
Export database records from the database detail page
This guide explains how to export database records from the database detail page. It covers one-time XLSX and CSV exports, Excel templates, export jobs, and scheduled database exports.
Prepare the Database View
The export starts from the database detail view. Configure the view before you open the export dialog.
- Navigate to Inventory → Databases
- Open the database you want to export
- Select the required time range
- Apply the required filters
- Sort the table by the required column
- Confirm that the expected records are visible in the table
The export dialog summarizes the selected time range, active filters, selected fields, and sorting.
Open Export Options
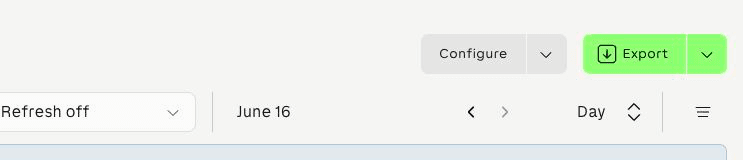
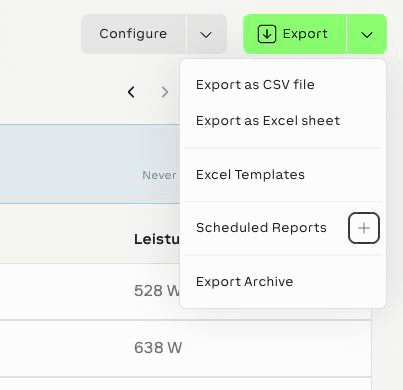
Use Export in the database detail toolbar to start a one-time XLSX export. Use the arrow next to Export to open all export actions.
| Action | Use for |
|---|---|
| Export | Start a one-time XLSX export with the current database view |
| Export as CSV file | Start a one-time CSV export |
| Export as Excel sheet | Start a one-time XLSX export |
| Excel Templates | Open template management for this database |
| Scheduled Reports | Open existing scheduled exports for this database |
| New Scheduled Export | Create a new scheduled export |
| Export Archive | Open the export job archive for this database |
Scheduled export and template management actions are available only to users who can edit the database.
Create an XLSX Export
Use XLSX exports when you need an Excel workbook, formatting, formulas, or a reusable template.
- Click Export
- Review the New Export dialog
- Confirm the Time Range
- Select the required Template
- Review the selected Fields
- Review the active Filters and Sorting
- Click Start Export
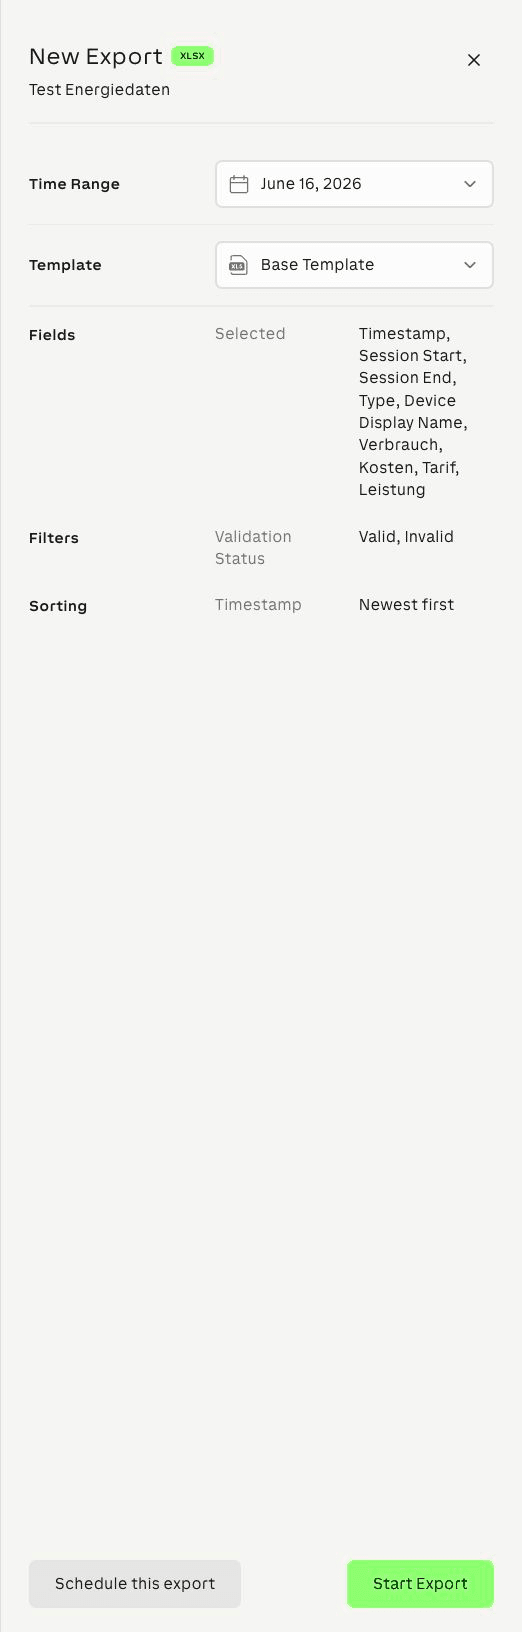
Exosphere starts an XLSX export job. Large exports can take time to prepare. Track the job in Export Archive.
XLSX Options
| Option | Description |
|---|---|
| Time Range | The date range used for the export. The dialog opens with the current database time range, and you can adjust it before starting the export. |
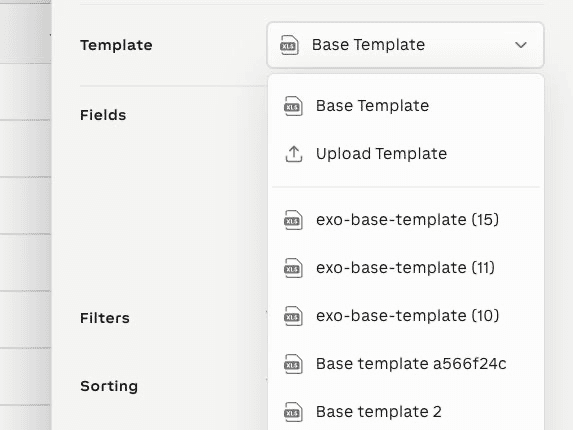
| Template | The Excel template used for the workbook. Select Base Template, Upload Template, or an existing template. |
| Fields | The database fields included in the export when using Base Template. |
| Filters | Active database filters summarized from the database view. |
| Sorting | The active table sort order. |
Template Options
| Template option | Description |
|---|---|
| Base Template | Uses the default workbook structure generated by Exosphere. |
| Upload Template | Lets you upload a custom .xlsx template for this database. |
| Existing templates | Reuse previously uploaded templates for the same database. |
When you select Upload Template, Exosphere shows an upload area and a Download Base Template action.
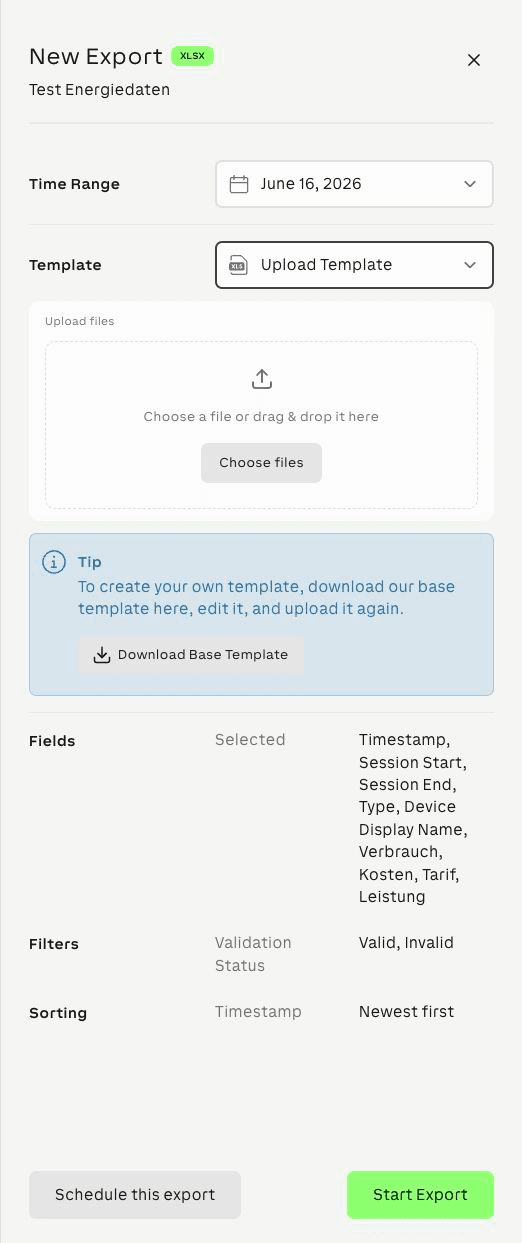
Use the base template as the starting point for custom templates. It contains the required ExoData structure. Add custom sheets, formulas, charts, or formatting, then upload the edited .xlsx file.
Custom templates must keep the required ExoData column IDs and structure. If the uploaded workbook does not match the database export source, Exosphere rejects the template.
Template Limits
- Regular workspaces can use one template per export source.
- Enterprise workspaces can manage multiple templates.
- Users need database edit permission to download base templates, upload templates, and manage templates.
Create a CSV Export
Use CSV exports when you need plain tabular data for external tools.
- Click the arrow next to Export
- Select Export as CSV file
- Confirm the Time Range
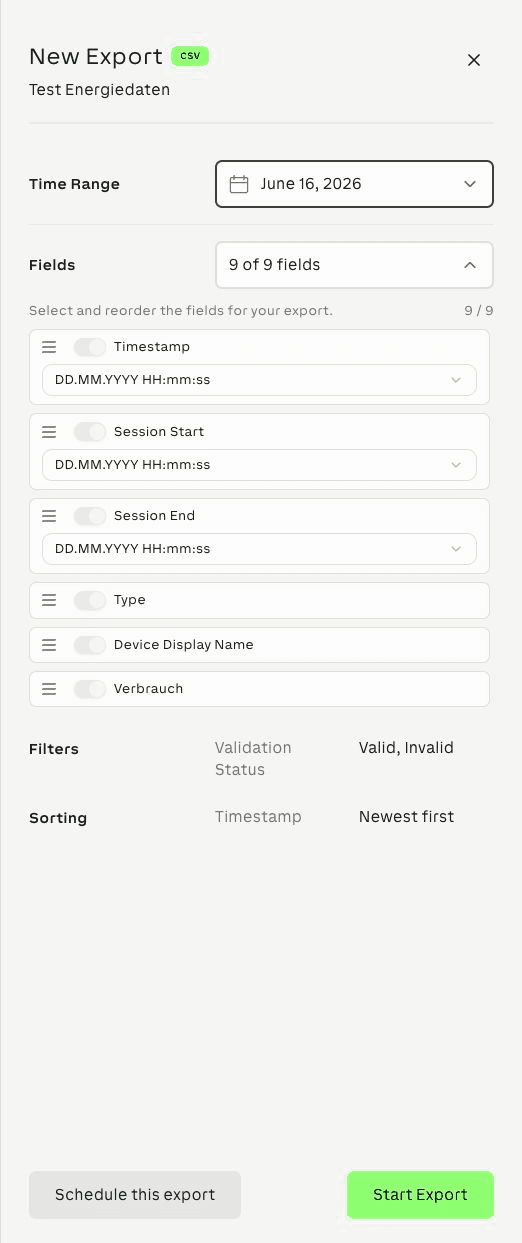
- Expand Fields
- Select the fields to include
- Reorder fields if required
- Select date formats for timestamp fields
- Review Filters and Sorting
- Click Start Export
CSV Field Options
| Option | Description |
|---|---|
| Field switch | Includes or excludes the field from the CSV export. At least one field must be selected. |
| Drag handle | Reorders the field in the exported CSV file. |
| Date format | Controls timestamp formatting for timestamp fields. |
| Unavailable badge | Indicates that a field cannot be exported in the current configuration. |
Date Format Options
| Format | Example |
|---|---|
| DD.MM.YYYY HH:mm:ss | 01.04.2026 14:30:00 |
| YYYY-MM-DD HH:mm:ss | 2026-04-01 14:30:00 |
| MM/DD/YYYY HH:mm:ss | 04/01/2026 14:30:00 |
| ISO 8601 | 2026-04-01T14:30:00.000Z |
The one-time CSV export dialog focuses on field selection, date formatting, filters, and sorting. CSV separator, decimal separator, and text identifier settings are available when configuring scheduled CSV exports.
Filter and Sort Behavior
The export dialog shows the active filters and sorting from the database detail page.
| Setting | How it affects exports |
|---|---|
| Time Range | Limits exported records to the selected time period. |
| Validation Status | Shows whether Valid and Invalid records are included. |
| Session Status | Shows whether Completed and Open sessions are included. |
| Column filters | Appear in the export summary when they are active and supported by the export format. |
| Sorting | Controls the exported row order. For example, Timestamp - Newest first exports newest records first. |
For XLSX export jobs, database source filters are limited to supported source filters such as database type, device display name, and session status. Use CSV when an export must preserve validation status or other table-specific filters exactly.
Export Jobs and Archive
Starting an export creates an export job. Open Export Archive from the export menu to review previous jobs.
Export jobs can have these statuses:
| Status | Meaning |
|---|---|
| Queued | The export is waiting to be processed. |
| Processing | Exosphere is generating the export file. |
| Completed | The export is ready to download. |
| Failed | The export could not be generated. |
| Canceled | The export was canceled before completion. |
Completed jobs can be downloaded from the archive. Failed jobs should be retried after checking the time range, fields, filters, and template.
Create a Scheduled Export
Use scheduled exports when the same database data must be sent regularly.
- Open the database detail page
- Configure the time range, filters, fields, and sorting
- Click the arrow next to Export
- Click New Scheduled Export
- Configure the schedule
- Click Create Scheduled Export
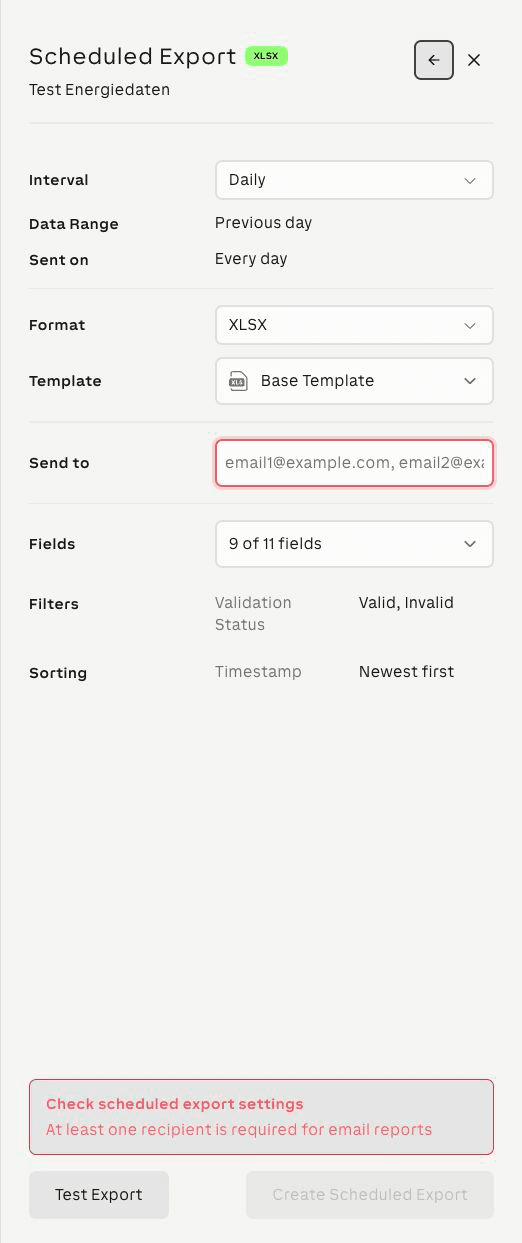
You can also open Export, review the current configuration, and click Schedule this export to create a schedule from that export draft.
Schedule Options
| Option | Description |
|---|---|
| Interval | Controls how often Exosphere creates the export. Available intervals include daily, weekly, monthly, quarterly, and yearly, depending on the workspace configuration. |
| Data Range | Shows the period included in each scheduled export. For example, a daily schedule exports the previous day. |
| Sent on | Shows when Exosphere sends or runs the schedule. |
| Format | Selects XLSX, CSV, or Webhook. Webhooks require Enterprise access. |
| Template | Available for XLSX schedules. Select Base Template, upload a template, or choose an existing template. |
| Settings | Available for CSV schedules. Configure separator, text identifier, and decimal separator. |
| Send to | Email recipients for XLSX and CSV scheduled exports. |
| Webhook URL | Destination URL for webhook scheduled exports. |
| Authorization | Optional authorization header for webhook requests. |
| Fields | Selects and reorders exported fields when the selected output mode supports field configuration. |
| Filters | Shows filters saved with the schedule. |
| Sorting | Shows the row order saved with the schedule. |
CSV Schedule Settings
| Setting | Options |
|---|---|
| Separator | Comma, semicolon, or tab |
| Use text identifier | Wraps text values with a text identifier when enabled |
| Decimal separator | Dot or comma |
Webhook Schedule Options
Webhook schedules send export data to an external HTTP endpoint.
- Select Webhook as the Format
- Enter the Webhook URL
- Enter an Authorization header if the endpoint requires one
- Open Request Info to review the HTTP request format and example payload
- Click Test Export to verify the configuration
- Click Create Scheduled Export
Webhook schedules are Enterprise-only.
Test a Scheduled Export
Use Test Export before saving or after editing a schedule.
| Test action | Result |
|---|---|
| Download | Downloads a test file for the current scheduled export configuration. |
| Send test email | Sends a test email for an existing email schedule. |
| Send test webhook | Sends a test webhook for an existing webhook schedule. |
The schedule cannot be saved until required fields, such as email recipients or webhook URL, are valid.
For schedule delivery options, schedule limits, and webhook payload details, see Export Center.
Permissions
| Capability | Requirement |
|---|---|
| Open database data | Database access permission |
| Create one-time exports | Database access permission |
| Manage templates | Database edit permission |
| Create scheduled exports | Database edit permission and available schedule limit |
| Manage scheduled exports | Database edit permission |
| Use webhook schedules | Enterprise access |
Shared database views do not show the full export management actions.
Troubleshooting
No data in selected time range
If Exosphere shows No data in selected time range, adjust the time range or filters and start the export again.
Start Export is disabled
For CSV exports, select at least one field. For XLSX exports, wait until template upload or template loading is complete.
Template upload fails
Download the Base Template, edit it, and upload it again. Do not rename or remove the ExoData sheet, and do not change required column IDs.
Scheduled export cannot be saved
Check the validation message at the bottom of the schedule drawer. Common causes are missing email recipients, invalid webhook URL, unavailable webhook access, or no selected fields.
Export takes a long time
Large exports can stay queued or processing while Exosphere prepares the file. Check Export Archive for the current status.
Related Documentation
- Databases - Create and manage database tables
- Export Center - Manage export jobs, templates, schedules, and CSV settings
- Value History - Export measurement-based table data
- Troubleshooting Observe Issues - Resolve export and report issues
- User Permissions - Role-based access control